Ever dreamed of having your own website, but don’t know where to start? You’re not alone. Many people think building a website requires coding skills or expensive tools, but the truth is—it doesn’t have to be difficult. Thanks to WordPress, anyone can create a professional-looking site in just a few simple steps. If you’re wondering how to make a WordPress website, this guide is here to make the process clear and stress-free.
Starting a website is like opening your own digital shop or office—it’s your space on the internet where people can find you, learn about you, and connect with what you offer. WordPress powers millions of websites worldwide, from personal blogs to large businesses, because it’s flexible, user-friendly, and customizable. In this step-by-step guide, we’ll walk you through everything from setting up hosting to designing your theme—so you can confidently launch a beautiful and functional WordPress website.
Why Choose WordPress for Website Building
Before we dive into the practical steps, let’s take a moment to understand why WordPress is the world’s most popular content management system (CMS). According to recent reports, more than 43% of all websites on the internet are built on WordPress. To put that into perspective, nearly half of the websites you visit daily—ranging from personal blogs to large business portals and even news sites—are powered by WordPress.
The reason behind this massive adoption is simple: flexibility, ease of use, and scalability. WordPress is beginner-friendly, allowing non-technical users to build professional websites without writing a single line of code. At the same time, it’s powerful enough for developers to create advanced, customized websites.
Let me cite you the reasons why people prefer building a website on WordPress rather than other platforms.
- Free and Open Source: WordPress is totally free (use WordPress.org). You have to pay only for the domain and hosting
- Easy to Use: you get ready-made templates and do not need to know coding language
- SEO-Friendly: WordPress websites are optimized for Google ranking with plugins and built-in features
- Highly Customisable: Thousands of WordPress themes are available, which are easily customisable
- Responsive Design: Websites made with WordPress are compatible on all devices (mobiles, tablets, and desktops)
- Secure and Reliable: WordPress websites are totally safe and secure
- Scalable: WordPress works for small blog websites, corporate business websites, and large e-Commerce stores
Many great WordPress sites are already online. From simple blogs to giant media companies, WordPress powers projects of all sizes. That’s why it’s an excellent choice for beginners and professionals alike.
WordPress.org Vs WordPress.com
When beginners hear WordPress, they get confused between WordPress.org and WordPress.com. The two platforms sound almost identical, but in reality, they are very different in how they work, what they offer, and who they are best suited for.
Many first-time website owners assume that both platforms are the same, but this misunderstanding can lead to choosing the wrong one. For instance, someone looking for a fully customizable business website may feel frustrated if they accidentally start with WordPress.com’s free plan, which offers limited design flexibility and prevents installing custom plugins. On the other hand, those who want a simple blog without worrying about hosting or security may prefer WordPress.com for its convenience.
Understanding the difference between the two is crucial before you start building your website, because switching later can be time-consuming and costly. Think of it like renting vs. owning a house—WordPress.com is like renting, with rules and restrictions, while WordPress.org is like owning your property, where you’re free to build, expand, and customize however you like.
WordPress.org
This is a free and open source software that you can install on your hosting server with complete control and flexibility. WodPress.org is the self-hosted, open-source version of WordPress. It’s free to download and can be installed on any web hosting server of your choice. With WordPress.org, you get complete control over your website—whether it’s the design, functionality, plugins, or monetization options. You can customize everything to match your brand, add as many features as you like, and truly “own” your website without restrictions.
WordPress.com
WordPress.com is a hosted service where your website runs on WordPress, but with limited flexibility. While you don’t have to worry about hosting or technical maintenance, the free plan has restrictions. For example, you can’t install custom themes or plugins, and WordPress.com displays its own ads on your site. To unlock advanced features, you’ll need to upgrade to their paid plans, which can get expensive compared to running a self-hosted WordPress.org website.
To create a WordPress website, always go with WordPress.org if you want full ownership and flexibility for your website.
WordPress Website Creation Process
Below are the steps for creating a website using the WordPress website builder.
- Deciding your niche
- Buying a Domain Name
- Buying a space (hosting) for data
- Interlinking the Domain and hosting with each other
- Installing WordPress
- Installing the theme template
- Installing required plugins
- Creating pages and content for the website
- Publishing the website to make it live
- Marketing strategy
Let us try to understand the process of making a WordPress website with these steps one by one.
1. Deciding Your Niche
Before launching a WordPress website, one of the first and most important steps is deciding the niche and the type of website you want to build. WordPress is a flexible platform that can be used for almost any purpose, so having clarity at the start will make your setup much easier.
For example:
- If you want to share your thoughts, experiences, or tutorials, you can create a blog website with WordPress.
- If your goal is to showcase your services or grow your brand, you can build a business website that looks professional and trustworthy.
- If you plan to sell products online, you can turn your WordPress website into a full-featured eCommerce store using plugins like WooCommerce.
Deciding on a niche helps you focus your content and design choices. It guides which theme, plugins, and layout you should use. For instance, a blog website may focus on readability and content presentation, while an e-commerce website will need product pages, shopping carts, and secure payment options.
In short, deciding the niche and having a clear vision of your WordPress website before you start will save you time, guide your decisions, and ensure your site grows in the right direction.
2. Buying a Domain Name
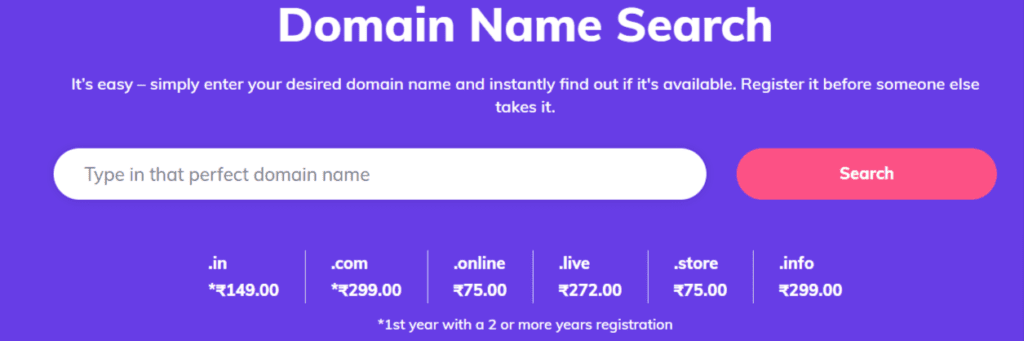
A domain is the unique name of your website, often described as its online address. When someone wants to visit your WordPress website, they’ll type your domain name into their browser—for example, www.yourbusiness.com. This makes it one of the most important elements of building your online presence, because your domain is usually the first impression visitors get of your brand.
When choosing a domain name, keep these points in mind:
- Keep it Simple and Catchy-A short, easy-to-remember domain makes it effortless for people to revisit your site.
- Avoid Hyphens and Numbers-These can make your domain look unprofessional and difficult to type.
- Make it Relevant-Choose a domain name that clearly reflects your business, niche, or the purpose of your WordPress website.
- Select the Right Extension-The most popular choice is .com, but you can also consider alternatives like .org, .net, or country-specific extensions such as .in if your audience is location-focused
The domain name should be simple and catchy, and without hyphens. It should be easily readable and represent your business. There are different domain name service providers such as GoDaddy, Namecheap, Bluehost, and Hostinger. You can log in to their platforms, search for available domain names, and purchase a package that suits your budget and long-term goals.
Choosing the right domain name is crucial because it not only builds trust and credibility but also supports the overall branding and visibility of your WordPress website. A professional domain can make your site look more authoritative, improve user recall, and even play a role in SEO.
3. Buying a Space (Hosting) for Data
Hosting is the place where all the files, images, and content of your WordPress website are stored so that visitors can access it online. Choosing the right hosting is a crucial step because it affects your website’s speed, security, and overall performance.
There are different types of hosting plans available from various hosting service providers, ranging from affordable options for beginners to high-performance plans for larger websites.
Shared Hosting: When you choose shared hosting, your WordPress website shares a server with multiple other websites. This is a cost-effective option and works well for small blogs or business websites with moderate traffic. Although it’s reasonably priced, shared resources like CPU and RAM could impact performance if there are a lot of other websites on the server.
Dedicated Hosting: Dedicated hosting gives your WordPress website an entire server exclusively for your use. This provides maximum performance, security, and control. It is ideal for large websites, e-commerce stores, or websites expecting high traffic. Dedicated hosting is more expensive than shared hosting but ensures your site runs smoothly even under heavy load.
When selecting a hosting plan for your WordPress website, consider factors such as website size, expected traffic, security needs, and budget. Popular hosting providers like Bluehost, SiteGround, and Hostinger offer beginner-friendly WordPress hosting plans with easy setup, automatic updates, and customer support to help you get started quickly.
To guarantee that your WordPress website runs smoothly, is safe, and offers your visitors a flawless experience, selecting the appropriate hosting is crucial.
4. Interlinking the Domain and Hosting with Each Other
The next step is to link your domain name with the host server. Check your cPanel details in the email. Look for the two hosting name servers in the cPanel and paste them into the domain name service provider account.
Step 1. Log in to Your Domain Registrar Account
- Go to the website of your domain provider (e.g., GoDaddy, Namecheap).
- Sign in to your account.
- Find the list of your registered domains.
Step 2. Locate DNS or Nameserver Settings
- Click on the domain you want to connect.
- Look for options like DNS Management, Domain Settings, or Nameservers.
Step 3. Get Nameservers From Your Hosting Provider
- Log in to your hosting account (e.g., Bluehost, Hostinger).
- Go to the WordPress hosting dashboard.
- Locate the section that lists your nameservers.
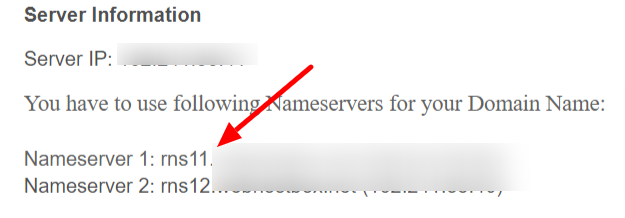
Step 4. Update Domain Nameservers
- Copy the nameservers provided by your hosting provider.
- Go back to your domain registrar account.
- Replace the existing nameservers with the ones from your hosting.
- Save the changes.
Step 5. Wait for Propagation
- DNS changes may take up to 24–48 hours to propagate globally.
- Once propagation is complete, typing your domain in a browser will load your WordPress website.
You can use free tools like whatsmydns.net to check if the domain points to your hosting server.
Step 6. Verify Your WordPress Website
- Log in to your WordPress dashboard.
- Navigate to Settings → General.
- Check that your WordPress Address (URL) and Site Address (URL) match your domain.
- Your website should now be live and accessible to everyone.
5. How to Install WordPress Using cPanel
Setting up a WordPress website is easier than many beginners think. With most WordPress hosting providers, you get access to cPanel, which includes the Softaculous WordPress installer—a tool that allows you to install WordPress in just a few clicks.
Follow this step-by-step guide to get your website live quickly:
Step 1. Log in to Your CPanel
- Click the login link (yourdomain.com/cPanel) that has been given to you by your hosting provider.
- Enter the username and password sent by your hosting provider.
- After logging in, you’ll be taken to your cPanel dashboard, where you can manage all aspects of your hosting account.
Step 2. Locate the Softaculous WordPress Installer
- In your cPanel dashboard, scroll down to the section called Softaculous Apps Installer or Website Applications.
- Click on the WordPress icon to begin the cPanel WordPress installation process.
Step 3. Start the WordPress Installation
- On the installation page, click Install Now.
- You’ll be redirected to a setup form where you’ll enter the details of your new WordPress website.
Step 4. Fill in Your Website Details
Complete the installation form:
- Choose the Installation URL– Select your domain name where WordPress should be installed.
- Site Name & Description– Enter the name of your WordPress website and tagline (editable later).
- Admin Username & Password– Create secure login credentials for your WordPress dashboard.
- Admin Email– Enter your email address for password recovery and updates.
Step 5. Access Your Website and Dashboard
Once installation is complete, you’ll see two links:
- Your Website URL– eg, www.yourdomain.com
- Admin URL (WordPress Dashboard)– eg, www.yourdomain.com/wp-admin
You can enter your previously created username and password to log in.. From here, you can start customizing your website with themes, plugins, and content.
6. Installing Theme & Template
The next step is to install the WordPress theme and template for your website. Choosing the right theme is an important step in creating your WordPress website, as it defines how your site looks. It is simple to install both free and premium themes with WordPress.
Here’s a simple step-by-step guide:
Step 1. Log in to Your WordPress Dashboard
- Go to www.yourdomain.com
- Enter your admin name and password
- You will now see your WordPress Dashboard
Step 2. Go to Themes Section
- From the left-hand menu, click Appearance > themes
- Here, you’ll see the currently installed themes and an option to add a new one.
Step 3. Add a New Theme
- Click the Add New button at the top of the page.
- You’ll be redirected to the WordPress theme directory, where you can search thousands of free themes.
- In the search bar, type the theme name (e.g., Astra, Hestia, OceanWP).
- Once it appears, hover over the theme and click Install.
- After installation, click the Activate button.
- The theme will now be applied to your WordPress website.
Step 4. Import Demo Templates
Most modern themes (like Astra and OceanWP) offer ready-made starter templates for different niches. For example, if you’re building a digital marketing website, you can import Astra’s Digital Marketing template in one click.
- Go to Appearance → Starter Templates (available if supported by your theme).
- Browse through the categories and select your niche.
- Preview the template, then click import.
Step 5. Customize Your Theme
- Navigate to Appearance → Customize.
- Here, you can edit colors, fonts, headers, footers, and other design elements.
- Click publish to save your changes.
That’s it! You’ve successfully installed and activated a WordPress theme. By importing a starter template and customizing it, you can create a professional-looking website in just a few minutes—even if you’re a complete beginner.
7. Installing Required Plugins
Plugins are like apps for your website. They are tools that help you customize your site, add new features, and improve its overall functionality—without needing to write any code. With plugins, you can turn a simple WordPress installation into a fully functional website tailored to your specific needs.
Some popular and must-have plugins for beginners include:
- Wordfence Security– Protects your WordPress website from hackers, malware, and other security threats.
- Yoast SEO– A powerful tool for on-page SEO optimization. It helps you write better meta titles, descriptions, and optimize content for keywords.
- Classic Editor– Brings back the old WordPress editor for users who like a simple way to write and edit posts or pages.
- Elementor– A drag-and-drop page builder that allows you to design professional-looking pages without coding.
- WpForms– Lets you create user-friendly contact forms so visitors can easily reach out to you.
Installing the Plugins is simple. Go to your WordPress dashboard, navigate to Plugins → Add New, use the search bar to find the plugin you need, and click Install Now and then Activate.
With plugins, you can build almost any kind of website—whether it’s a business website, blog, portfolio, or eCommerce store. However, it’s important not to overload your site with too many plugins, as this can slow down performance. Stick to essential and trusted plugins for the best results.
8. Creating Pages and Content for the Website
After making a WordPress website, we are ready to create website pages and the content of pages and blogs/and posts. Write the content of the pages related to your niches and make the necessary edits. Insert proper keywords across the whole content.
Here are some of the essential pages every WordPress website should have:
- Home Page– The first impression of your site. It should be welcoming, highlight your niche, and briefly explain what you offer.
- About Us Page – Shares your story, mission, and values. This page helps build trust and a personal connection with your audience.
- Services Page– If you are running a business, list your services or products here, with clear descriptions and benefits.
- Contact Page– Provides easy ways for people to reach you, such as a contact form, email address, or social media links.
- Blog Page– A section to regularly publish articles or posts related to your niche. Blogs not only attract visitors but also help with SEO.
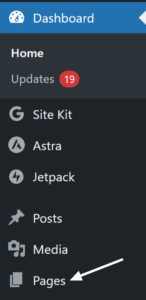
Once these key pages are in place, you can expand your site further with additional sections like a Portfolio, Testimonials, or FAQ page, depending on your niche. Remember, your content should always be original, useful, and keyword-optimized to help your website rank better in search engines and attract the right audience. To add a page to the website, go to the admin dashboard of the Website, click on the pages, and click Add New.
9. Publishing the Website to Make it Live
Please remember not to make your website live until you have sufficient data in the form of articles or blogs. Write as much content as possible. Add images to the content and put alt text on the images. Compress the image and keep it between 100 KB in size. Adding images with higher pixel resolution lowers the speed of the website. Make it a habit to write content on a daily, weekly, or monthly basis as suits you. It would be much better to create a content calendar for your convenience.
Over time, this consistent effort will help you build WordPress expertise. By learning how to balance design, content creation, SEO, and performance optimization, you not only improve your own website but also gain valuable skills that can be applied to other projects or even offered as professional services.
10. Marketing Strategy
Building a WordPress website is just the beginning of your online journey. Think of your website as a brand-new shop in a busy marketplace. You may have the best products or the most valuable content, but if no one knows it exists, you won’t get visitors. That’s why having a clear marketing plan is just as important as designing and publishing your site. With a proper marketing strategy, you can get your website to rank on Google’s search pages. Do the required SEO, include keywords, and share on social media platforms to attract the maximum audience.
A good marketing plan helps you:
- Attract Visitors through search engines, social media, and referrals.
- Build Trust by consistently sharing valuable content.
- Generate Leads and Sales if your website is for business.
- Grow Your Authority in your niche by providing solutions to your audience’s problems.
Here are some beginner-friendly strategies you can use to promote your WordPress website:
1. Search Engine Optimization: Optimize your site with keywords, titles, meta descriptions, and high-quality content so it appears on Google’s search results. Plugins like Yoast SEO make this process much easier.
2. Content Marketing: Write blogs, tutorials, and guides related to your niche. Fresh, useful content attracts organic traffic and gives visitors a reason to return.
3. Social Media Sharing: Promote your blog posts, services, or products on platforms like Facebook, Instagram, LinkedIn, or Twitter to reach a wider audience.
4. Email Marketing: Build an email list using tools like Mailchimp or WPForms. Share updates, offers, and helpful resources to keep your audience engaged.
5. Networking and Guest Posts: Collaborate with other bloggers or websites in your niche. Writing guest posts on great WordPress sites can bring new visitors to your own website.
6. Analytics and Optimization: Use Google Analytics or MonsterInsights to track how visitors find your site. This helps you improve your content and strategy over time.
Remember, marketing isn’t a one-time task. It’s an ongoing process. The more consistent you are with promoting your WordPress website, the more traffic, leads, and opportunities you’ll generate.
Common Beginner Questions About WordPress Websites
1. How Long Does it Take to Build a WordPress Website?
It depends on your experience. A simple blog can be set up in a day, while a professional eCommerce store might take weeks. On average, beginners can expect to build a WordPress website between 1–7 days.
2. How to See if a Site is WordPress?
If you want to know whether a website uses WordPress, you can check by right-clicking on the page and viewing the source code. Look for “wp-content” in the code. That’s the easiest way to find a WordPress website.
3. Can I Change My Theme Later?
Yes, you can always switch to a new theme without losing your content. Just be careful, as it may slightly affect the design and format of your website.
4. Do I Need to Know Coding?
Not at all. You can create a WordPress website without writing a single line of code. Page builders and plugins make the process simple.
5. Are Free WordPress Themes Enough?
Yes, for most beginners, free themes work perfectly. You can always upgrade to premium themes later.
Mistakes to Avoid While Creating a WordPress Website
- Installing too many plugins
- Use heavy images (appropriate size is up to 100-150 KB). This may slow down your website speed (site loading speed must be up to 3-4 seconds maximum)
- Ignoring responsiveness (a website must be compatible on all devices)
- Forgetting to back up your website
- Not optimizing for SEO from the very beginning
Final Thoughts
Building a WordPress website may seem hard at first, but once you understand the steps, it becomes simple and exciting. From choosing your niche and domain to designing your theme, installing plugins, and publishing your site, WordPress makes the process beginner-friendly.
Whether you are creating a blog, a business website, or an online store, WordPress gives you the flexibility and tools to succeed. Take your time, experiment, and don’t hesitate to explore different themes and plugins. Remember, even great WordPress sites started small. Now it’s your turn. Start building your own WordPress website today, and share your journey with others.
